Integrate Forms On Fire with Tugboat Logic

Kendall Kunz

Custom forms will rapidly support your evidence collection

A row of filing cabinets filled with books in a library.

Embarking on your SOC2 or ISO27001 certification can seem daunting, especially when it comes to collecting evidence for controls. Tugboat Logic comes pre-built with integrations for automatic evidence collection from cloud and other operational systems. However, when it comes to manually collecting evidence, assembling documentation and filing information properly into Tugboat, this is where things can really bog you down...but it doesn't have to be that way.


Manual tasks, such as employee termination checklists, asset assignments, ethics violations, and more, are easily managed by rapidly designing data collection forms using Forms On Fire. Designing the forms themselves will standardize the quality of data being collected and this is helpful. Even more helpful, however, is completely automating the proper filing of that evidence into Tugboat Logic using Custom Integrations on the Tugboat side, and REST Connectors on the Forms On Fire side of things.

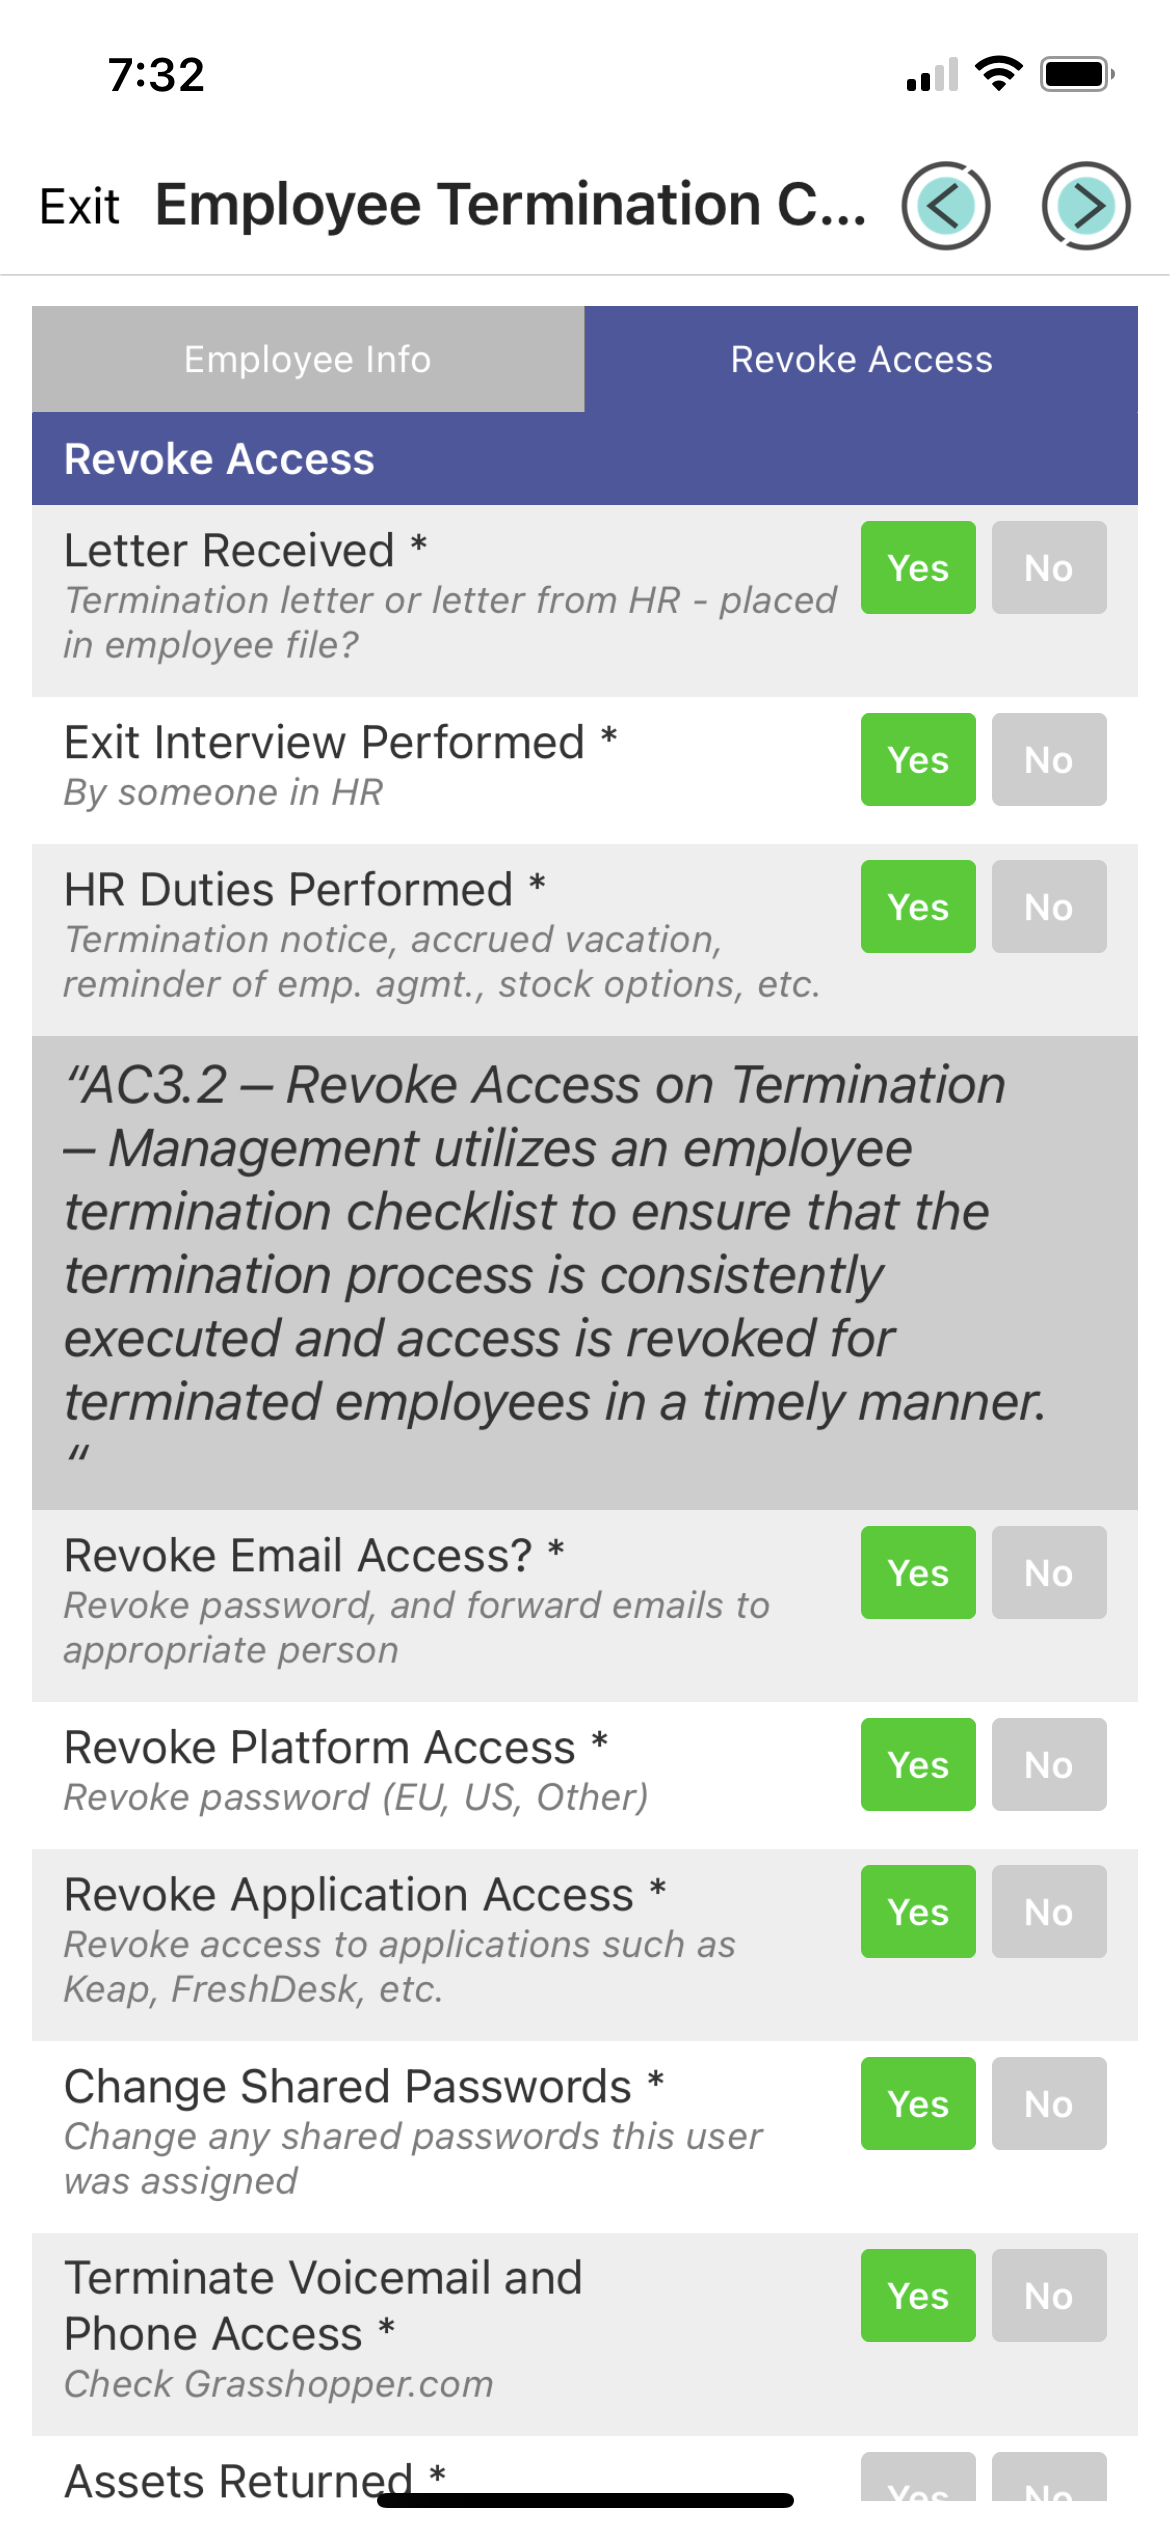
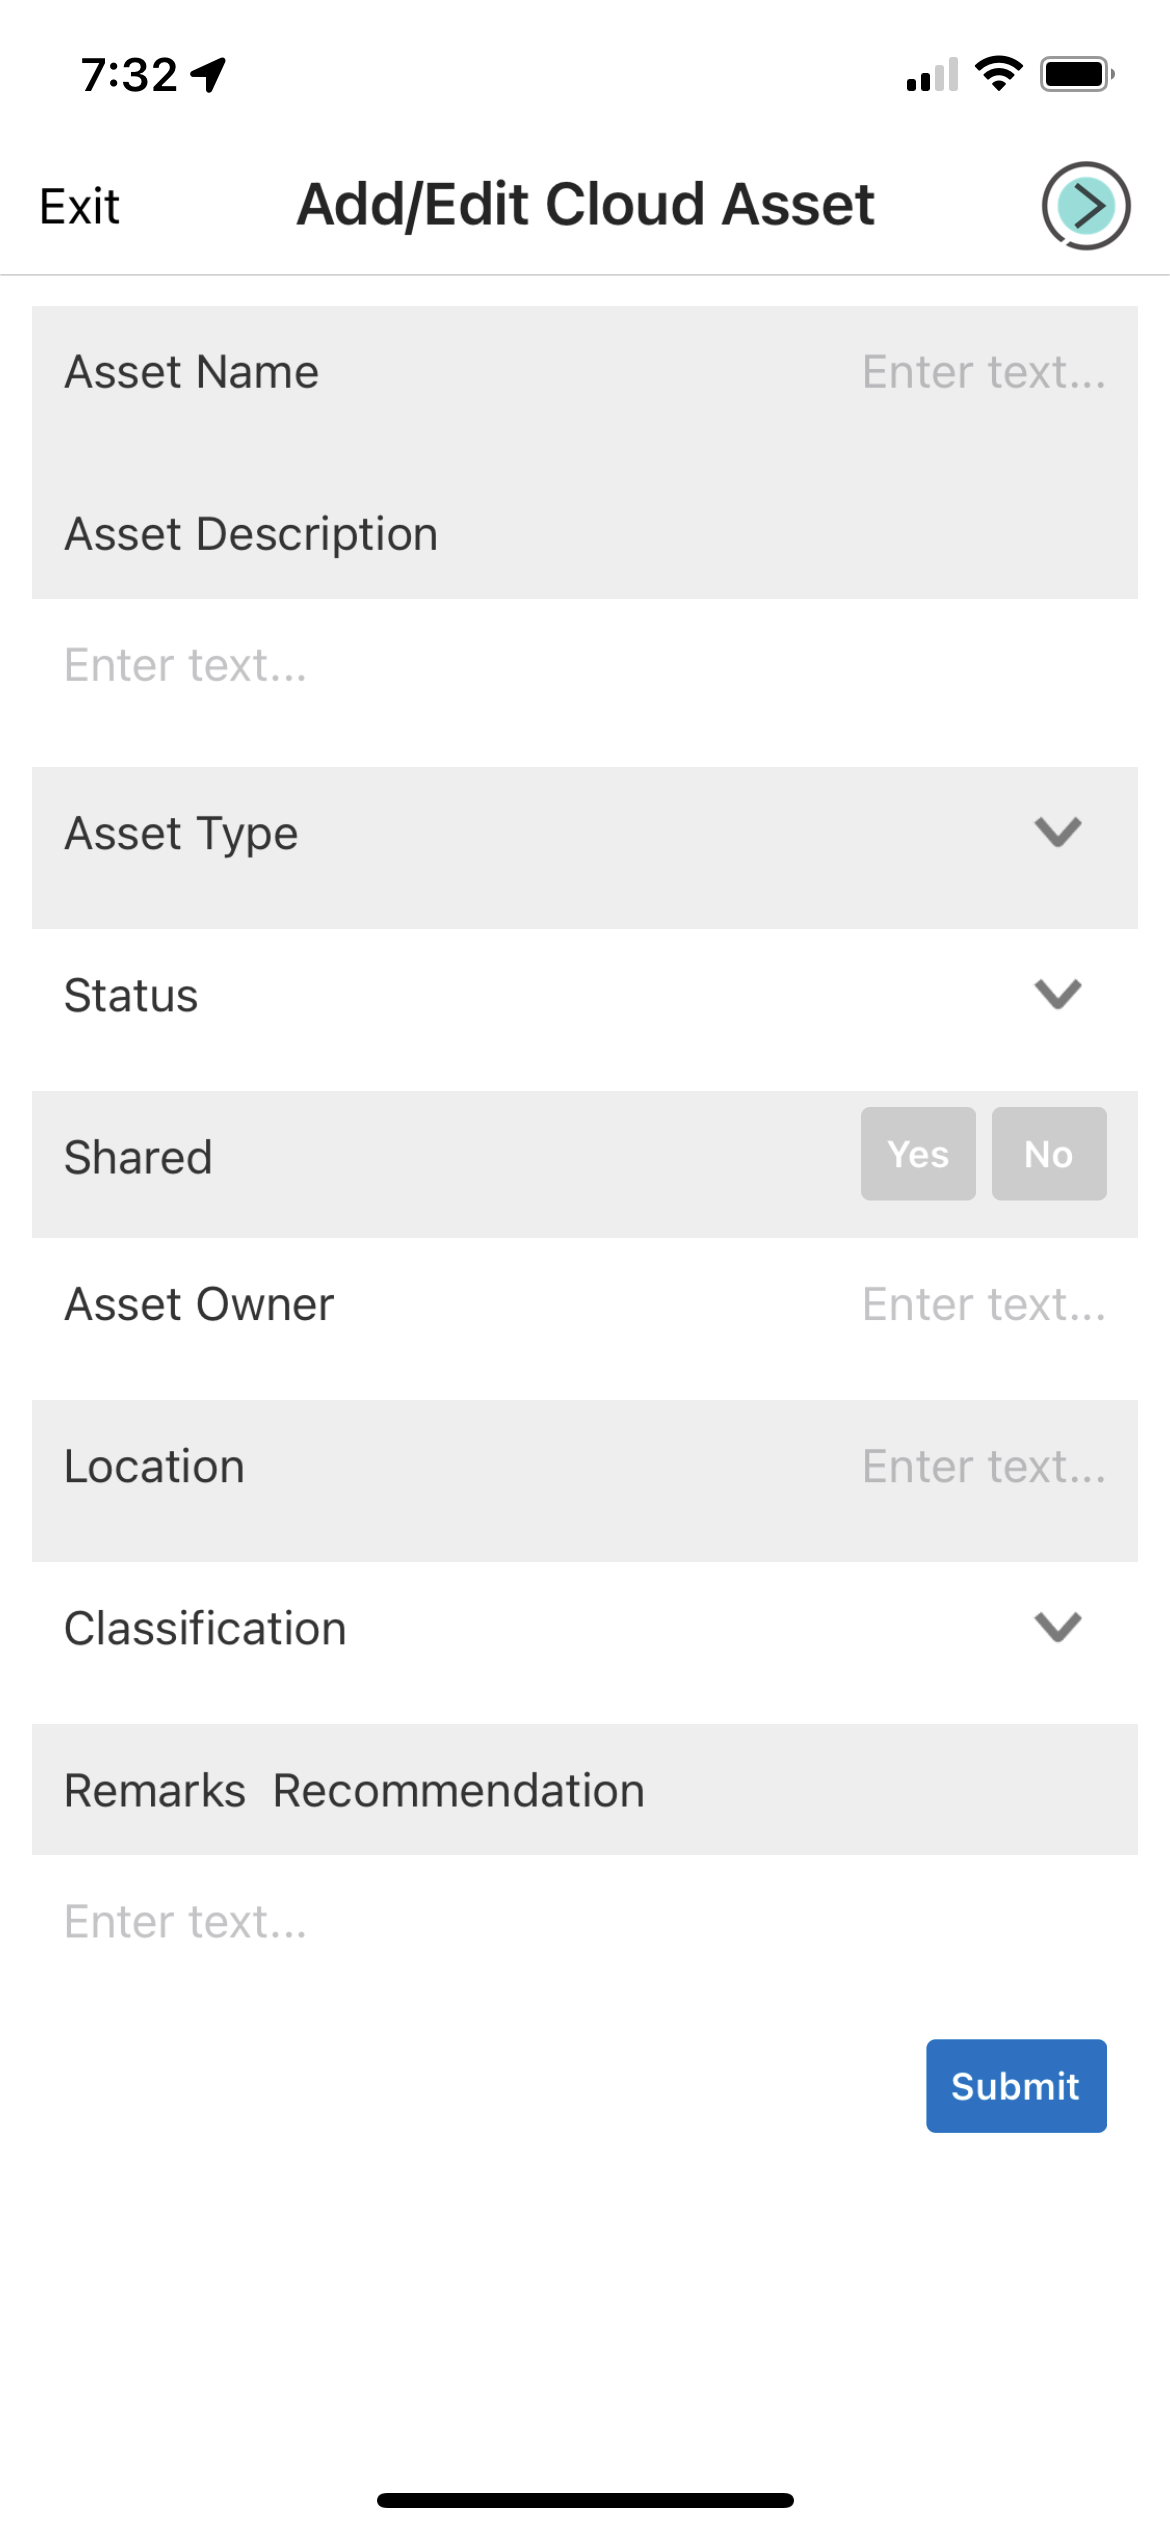
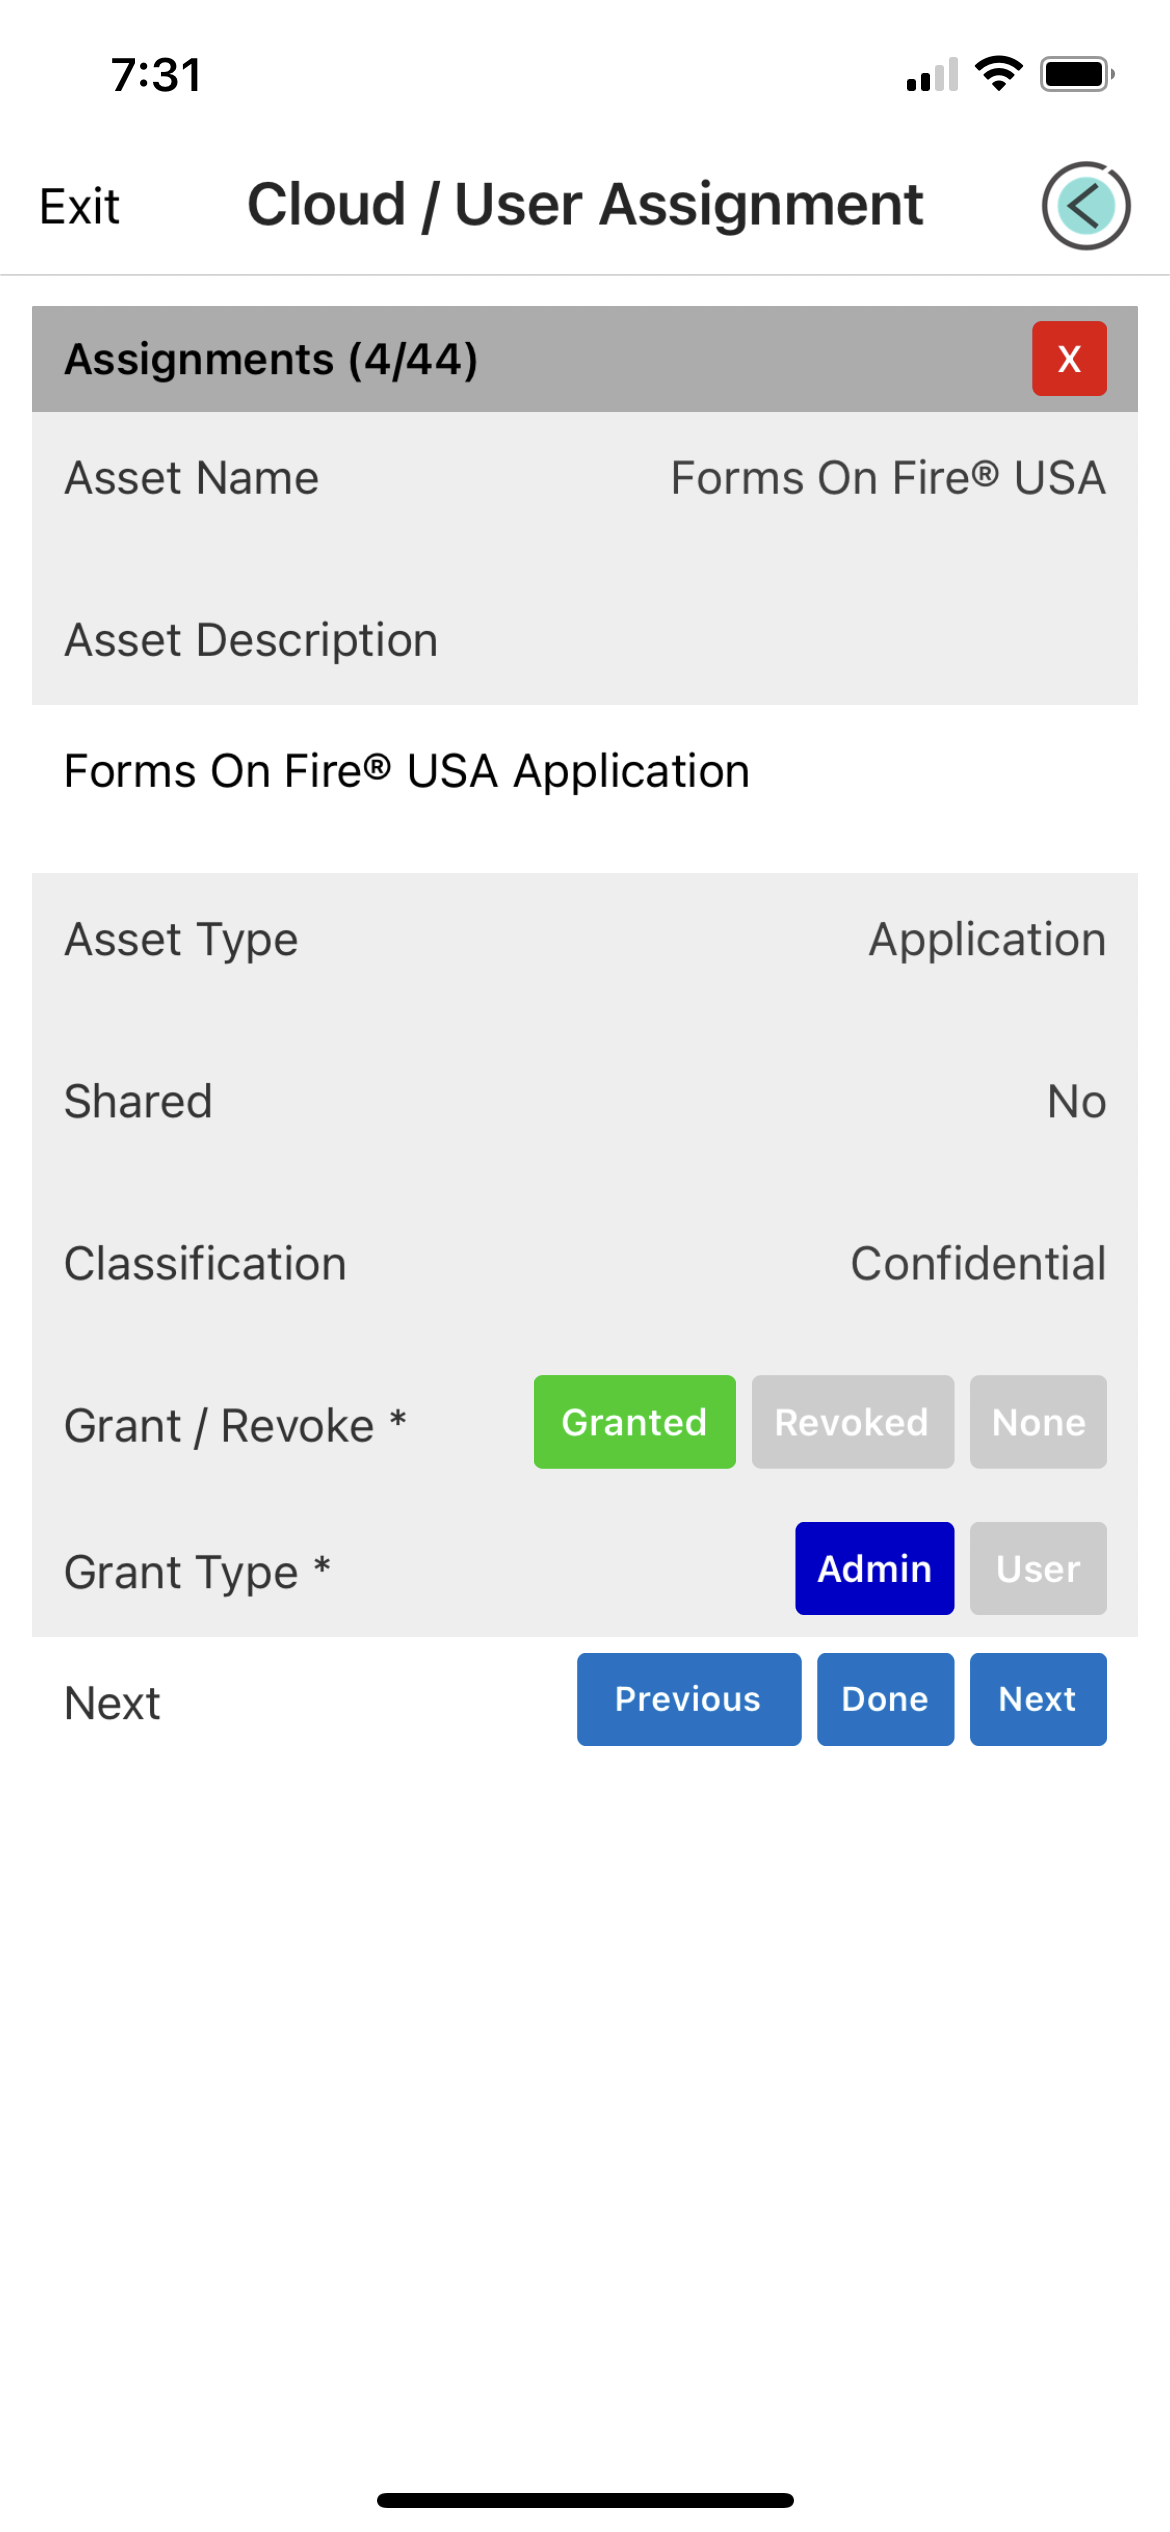
The three forms shown above are just a few we use at Forms On Fire for gathering evidence. These three include an employee off boarding checklist that confirms system access revocation, an asset inventory list for adding and deprecating assets, and asset access assignment form to capture the matrix of employees to system access. Each unique Forms On Fire app has their own direct REST connector to Tugboat Logic.

Two simple steps connects Forms On Fire and Tugboat Logic

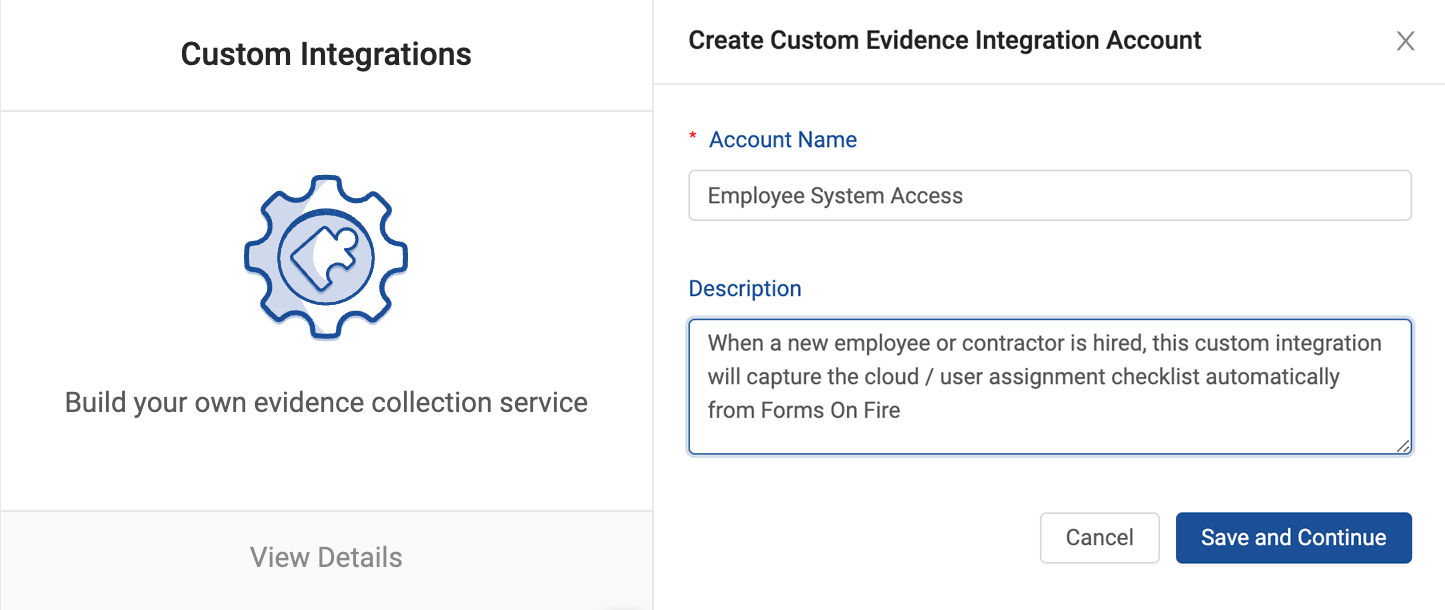
A screenshot of a page that says create custom evidence integration account

STEP 1: In Tugboat Logic, navigate to the Integrations page and choose Custom Integrations. Click on the orange +add button and create a new integration. Give your custom integration a user name and generate a password. 


Assign this Custom Integration to an evidence collection task. In this instance, we are connecting to "User Access Approval List to Application, Infrastructure and Service" 


Lastly, download the JSON file with the webhook credentials.

A screenshot of a web page with a lot of fields and buttons.

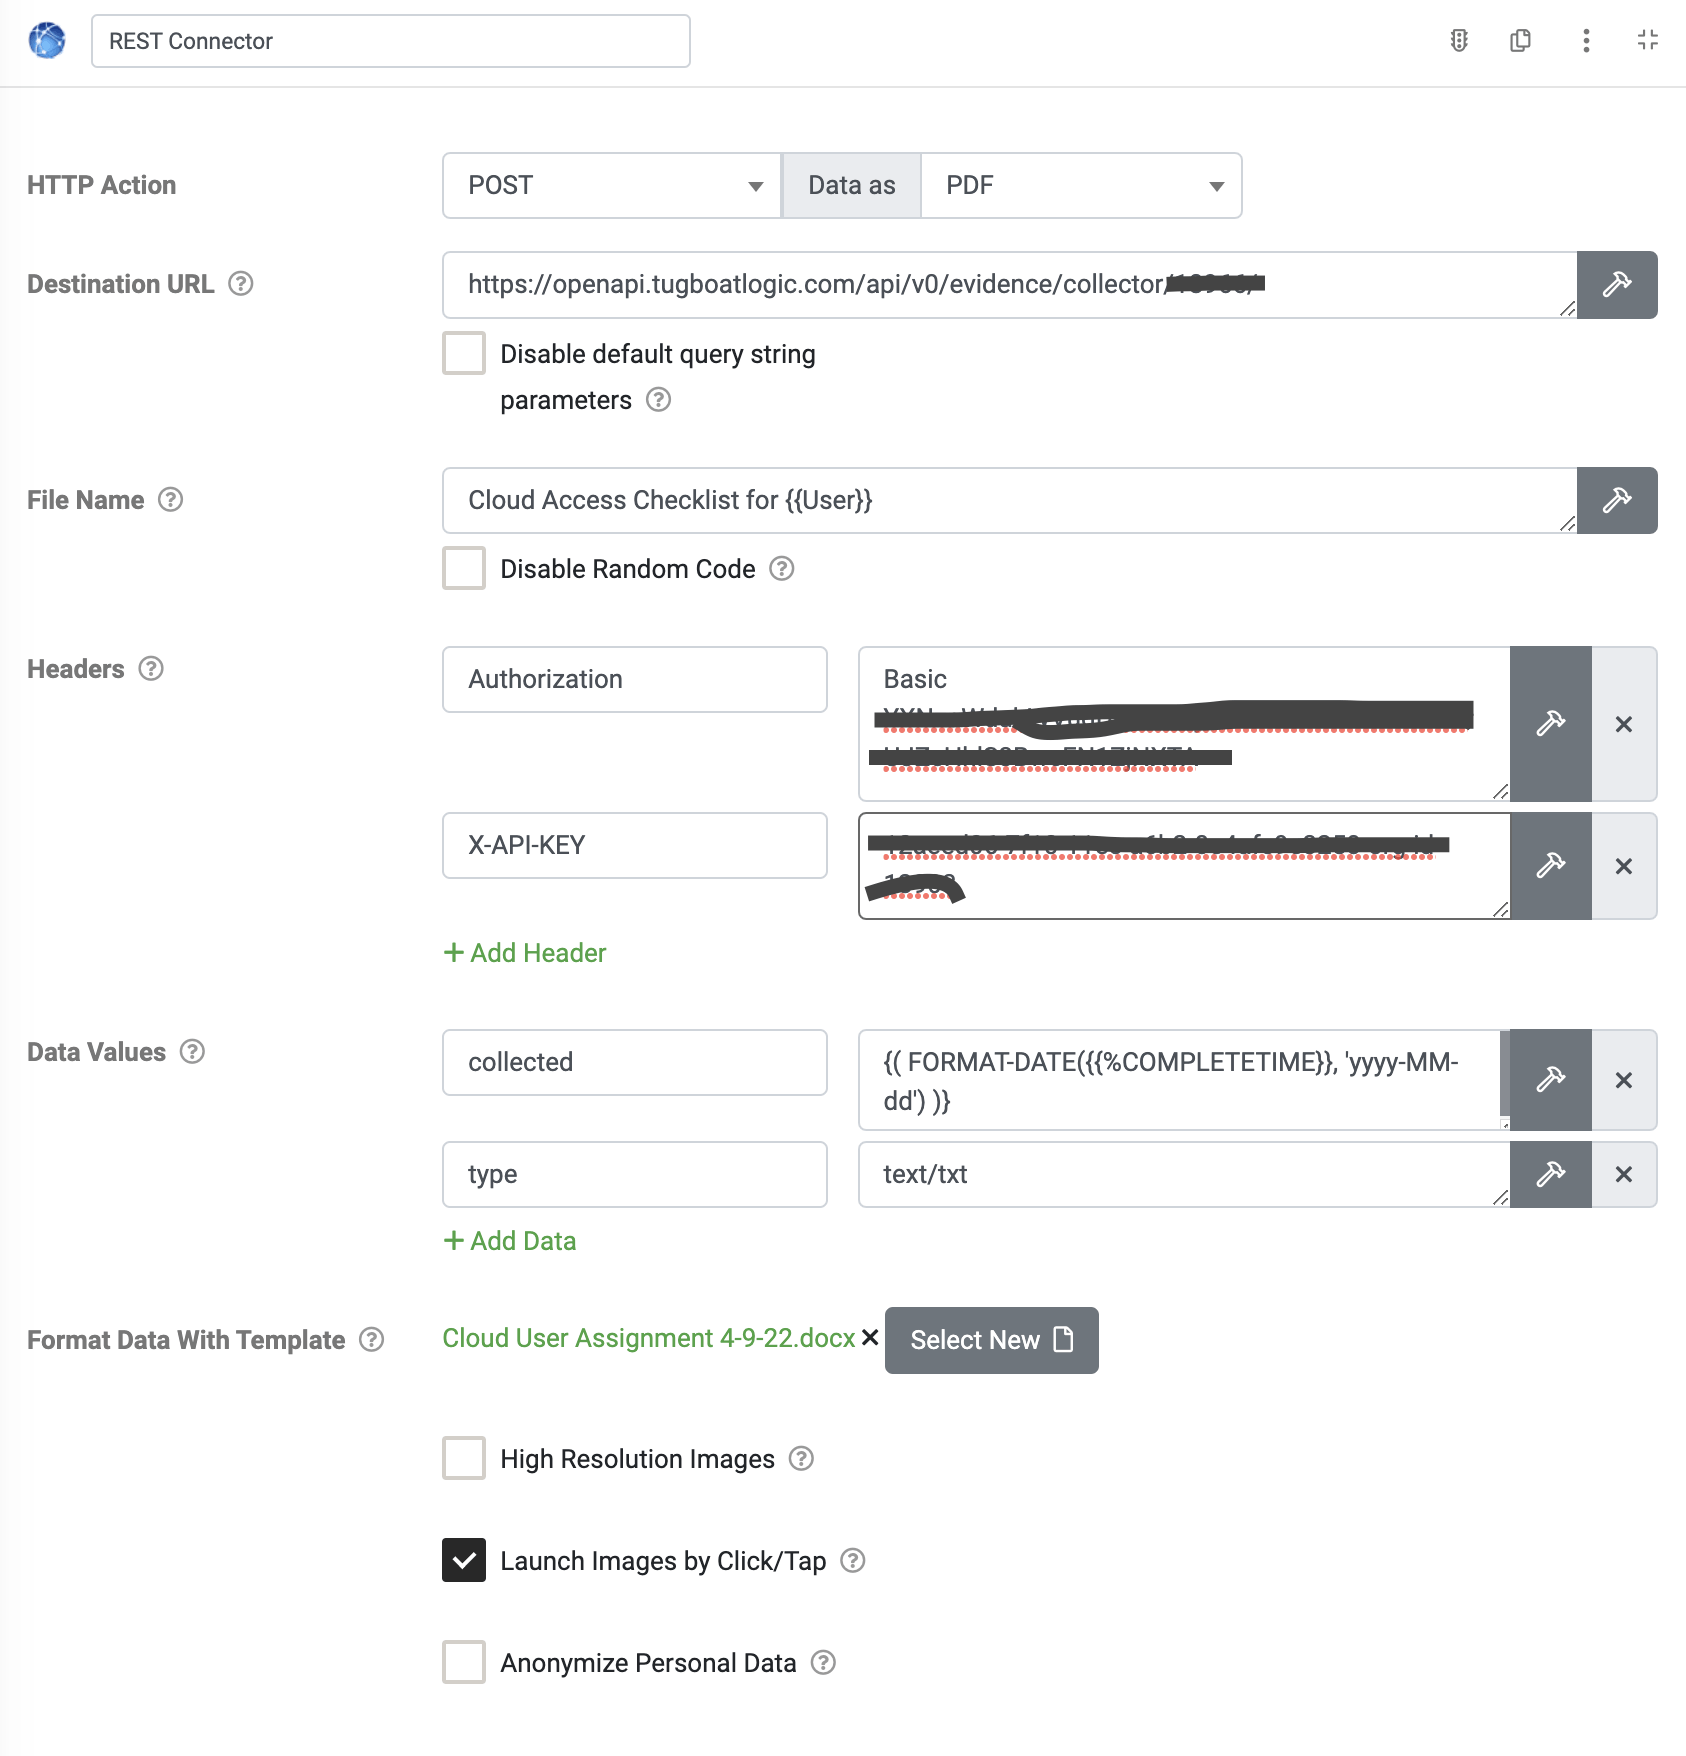
STEP 2: Now head on over to Forms On Fire, navigating to connectors for your specific form. Click on Add New integration and choose REST Connector. Enter the data for action, destination URL, and File Name. (See image to the right -->)


For Authorization, use the term Basic and then copy in the Authorization created in Tugboat Logic. 


X-API-KEY also comes from Tugboat Logic. Finally, the Data Values for collected and type are as you see in the image. 


Test your integration by submitting a form and discovering if it lands into your Evidence Collection for the custom integraiton in Tugboat Logic. 


Custom Integrations in Tugboat Logic are very powerful and since many compliance tasks require a human to gather information, at least now you can eliminate the process of document assembly, distribution and filing automatic. 

Share by: