Capture Google Maps Images in Forms On Fire
Using Google’s Open API, forms designed in Forms On Fire can easily display map images from Google Maps right on the screen for users to reference and annotate!
In short, the Forms On Fire Media field allows any image to be captured from a URL. The Google Static Maps API gives you the ability to GET a static map or street map image using a simple URL. These instructions demonstrate how you can dynamically build this Google API URL to GET either a static map or street map image. An example of the Google static map URL is as follows:
https://maps.googleapis.com/maps/api/staticmap?center=Brooklyn+Bridge,New+York,NY&zoom=13&size=600%C3%97300&maptype=roadmap&markers=color:blue%7Clabel:S%7C40.702147,74.015794&markers=color:green%7Clabel:G%7C40.711614,-74.012318&markers=color:red%7Clabel:C%7C40.718217,-73.998284&key=YOUR_API_KEY
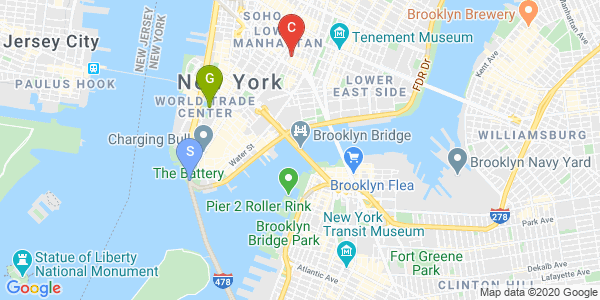
The URL above results in this static map image.
Notice the last item in the URL above, displayed as YOUR_API_KEY, is a paid Google API key. As of the date of this writing, the cost to use the API is $2 per 1000 hits. You can read more about the Google Static Maps API and purchase a license from Google here:
https://developers.google.com/maps/documentation/maps-static/overview
1. To start, create a GPS field, {{gps}}. Grant the option to Enable Address Lookup if desired (though this won’t be necessary for showing the map images). The next few steps after this will be creating fields that feature pieces of the Google Maps URL for the chosen GPS point.
2. Create 2 hidden fields, {{Lat}} and {{Lon}}, which will be built with dynamic values to grab the latitude and longitude from the GPS field – i.e., LAT({{gps}}) and LON({{gps}}).
3. Create a choice field {{ZoomLevel}} which will select a value from a new Data Source which you should create and name “Google Maps Zoom Level.” See the attached spreadsheet to download and import into this new data source. Sort this in Ascending order based on the column Answer Value.
4. Create another choices field {{Scale}} with a static list of answer choices: 1, 2 and 4. This will determine the scale of the map view. We recommend setting the Default Value to 2, since this will offer arguably the best map view.
5. Create another choices field {{MapType}} with another set of static choices; this will be used to select the type of map image displayed:
- Roadmap
- Satellite
- Terrain
- Hybrid
6. Now that the components for the overhead image are in place, we can create a Media field {{GoogleMapImage}} that will feature a formula in its Dynamic Image property that will build a URL from the data being collected.
- Set the media field to Capture Only, optionally allow the media field to Copy to Device Gallery
- Insert the following or similar into the Hint Text property:
- “Press Capture to get a google map image of this location: {{Lat}}, {{Lon}}”
- The formula in the Dynamic Image property should be as follows: CONCAT(‘https://maps.googleapis.com/maps/api/staticmap?center=’, {{Lat}}, ‘,’, {{Lon}}, ‘&size=1280×1280&format=png32&zoom=’, {{ZoomLevel}}, ‘&maptype=’, {{MapType}}, ‘&scale=’, {{Scale}}, ‘&key=YOUR_API_KEY’)
Now that the Google Map Image field has been created, we’ll create several fields that will produce an image for the street-level view.
- First, create another Choices field {{Heading}} with these static choices; this will serve to choose the direction of the street-level view:
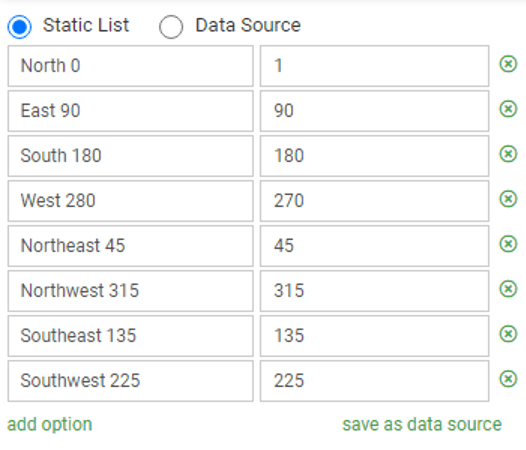
The above direction headings were chosen as 8 points on a compass. Alternatively, you may allow a free-form set of values between 1 and 360, or a pre-determined direction in the URL.
- Set the field to Capture Only, and optionally, Copy to Device Gallery
- We suggest putting the following into Hint Text:
“Press Capture to get a google street map of this location: {{Lat}}, {{Lon}}” - Write the following into the Dynamic Image property:
CONCAT(‘https://maps.googleapis.com/maps/api/streetview?size=600×600&location=’, {{Lat}}, ‘,’, {{Lon}}, ‘&heading=’, {{Heading}}, ‘&pitch=-0.76&key=YOUR_API_KEY’)
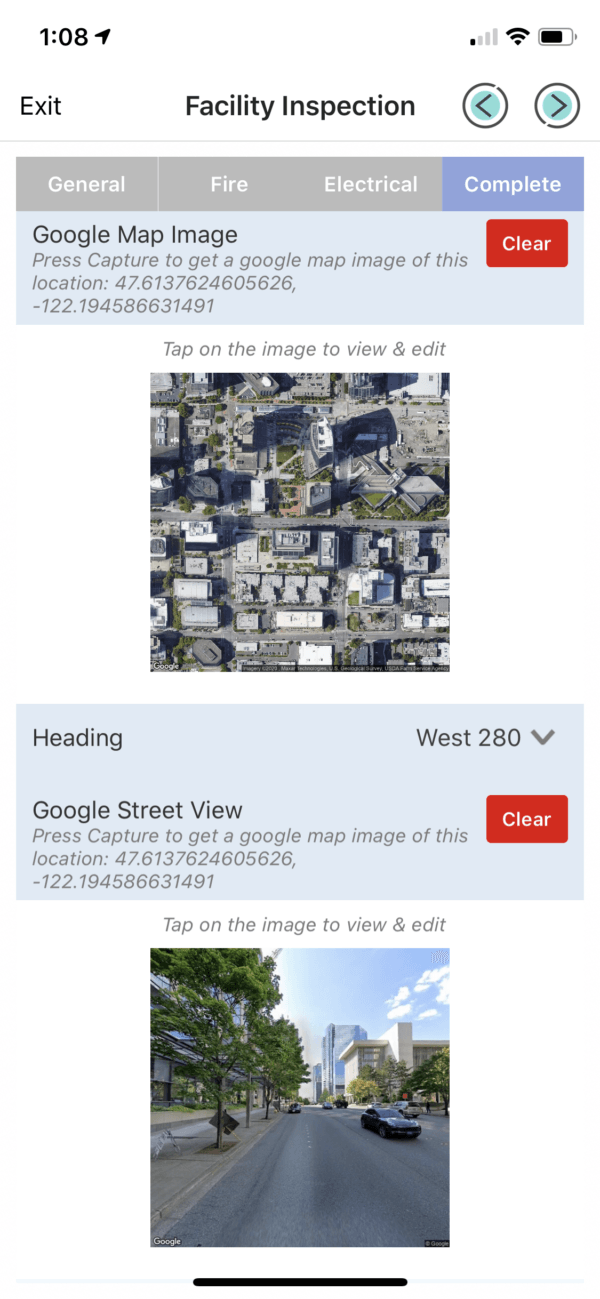
The form has now been created! Save and put the desired user(s) into test mode via the Manage Test button. Open the form in the app, taking the following steps to view the images:
- Click the GPS button under “Capture Location” (note: location permissions for the app must be granted for this to work). You should immediately see a Google Maps image populate in the Media field below!
- Select the desired options such as Zoom Level, Scale and Map Type.
- Select the Heading value below to change the direction of the Google Street View below it.